Vegetarian

Chive Dumplings by Leslie DiCorpo

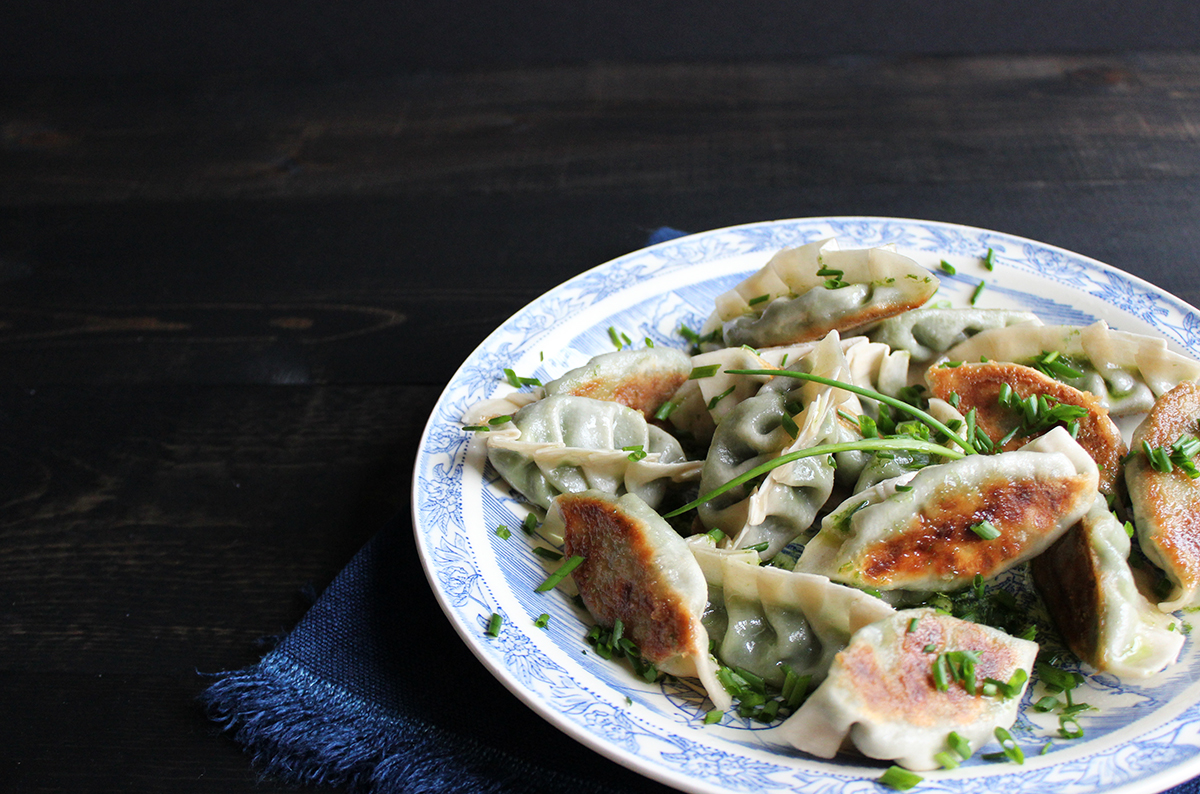
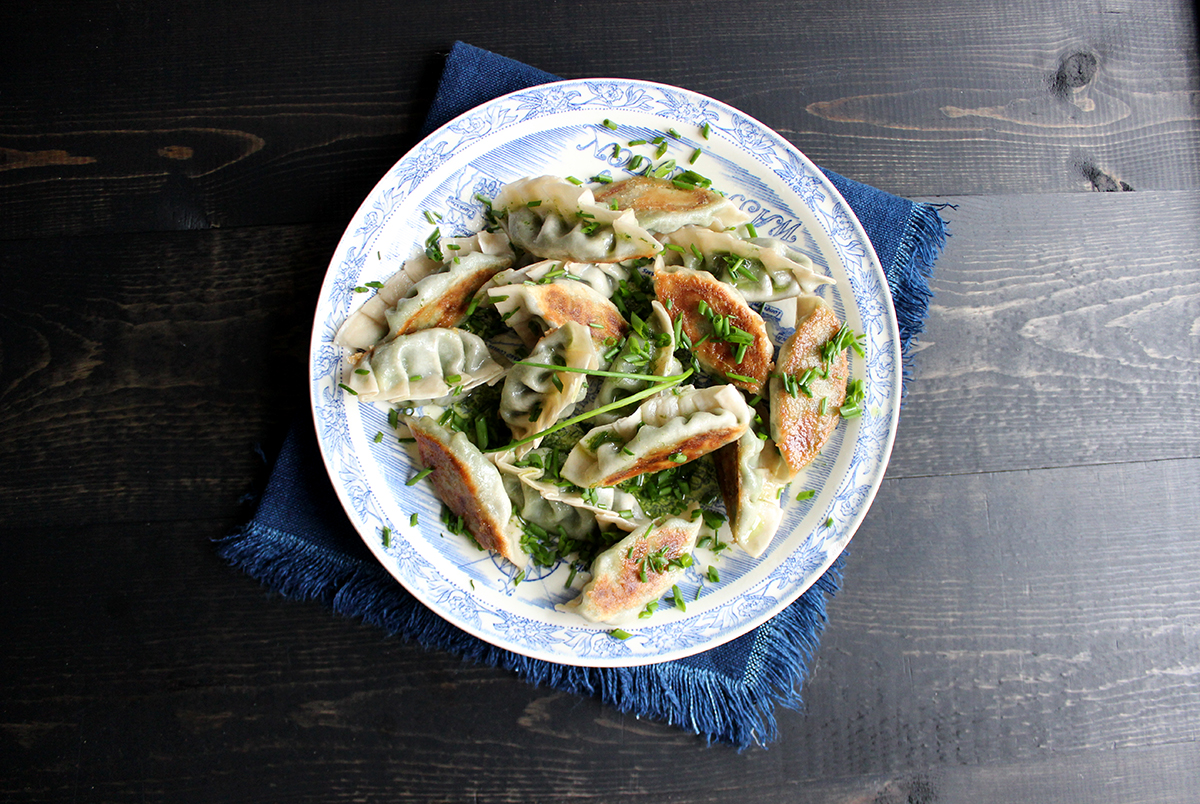
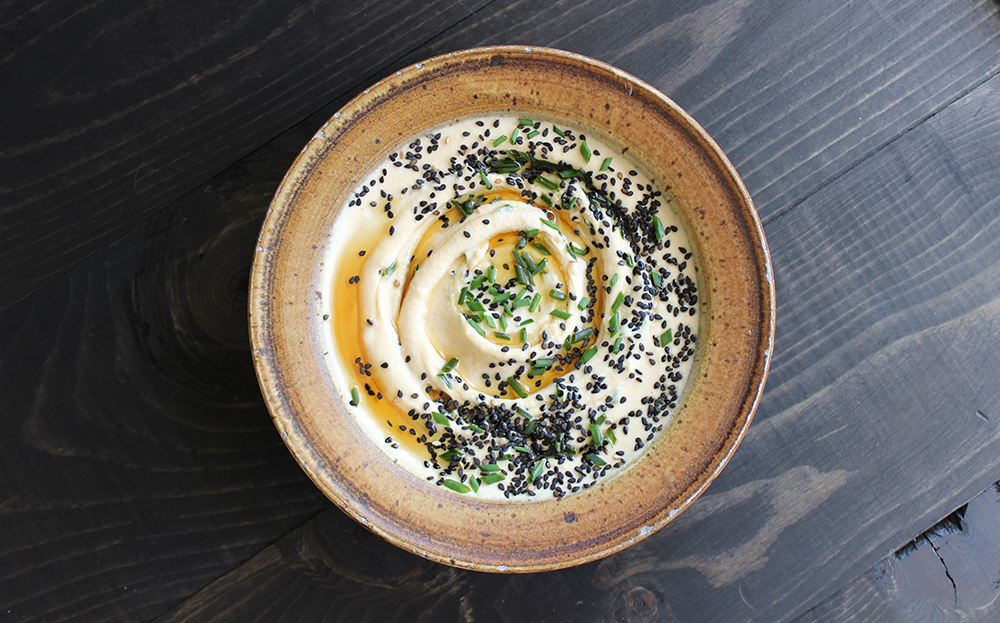
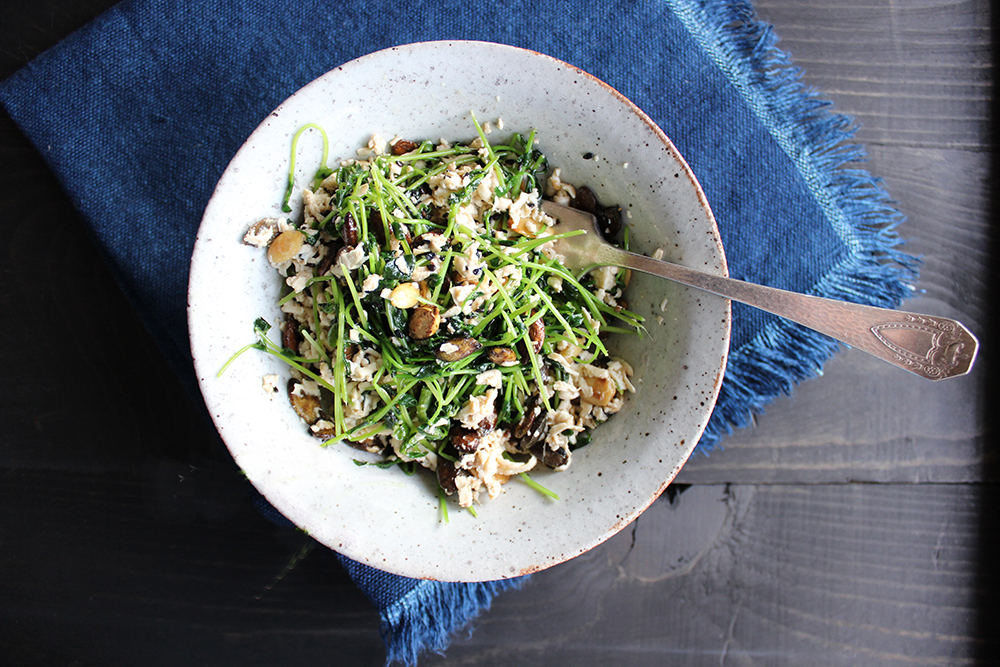
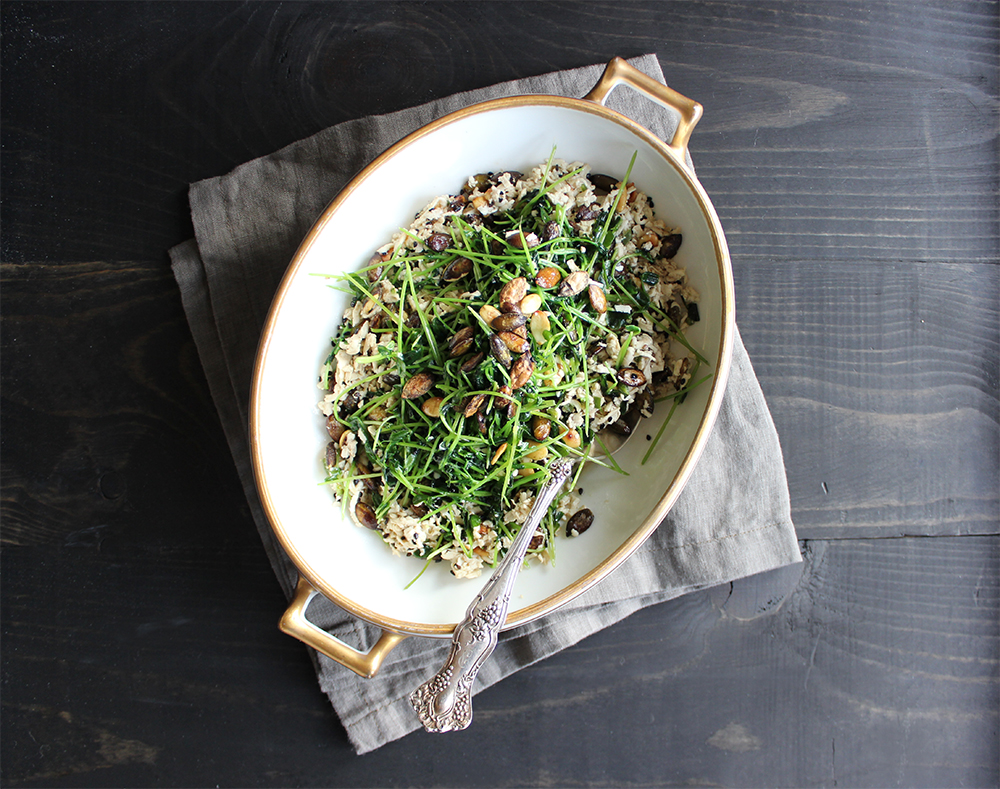
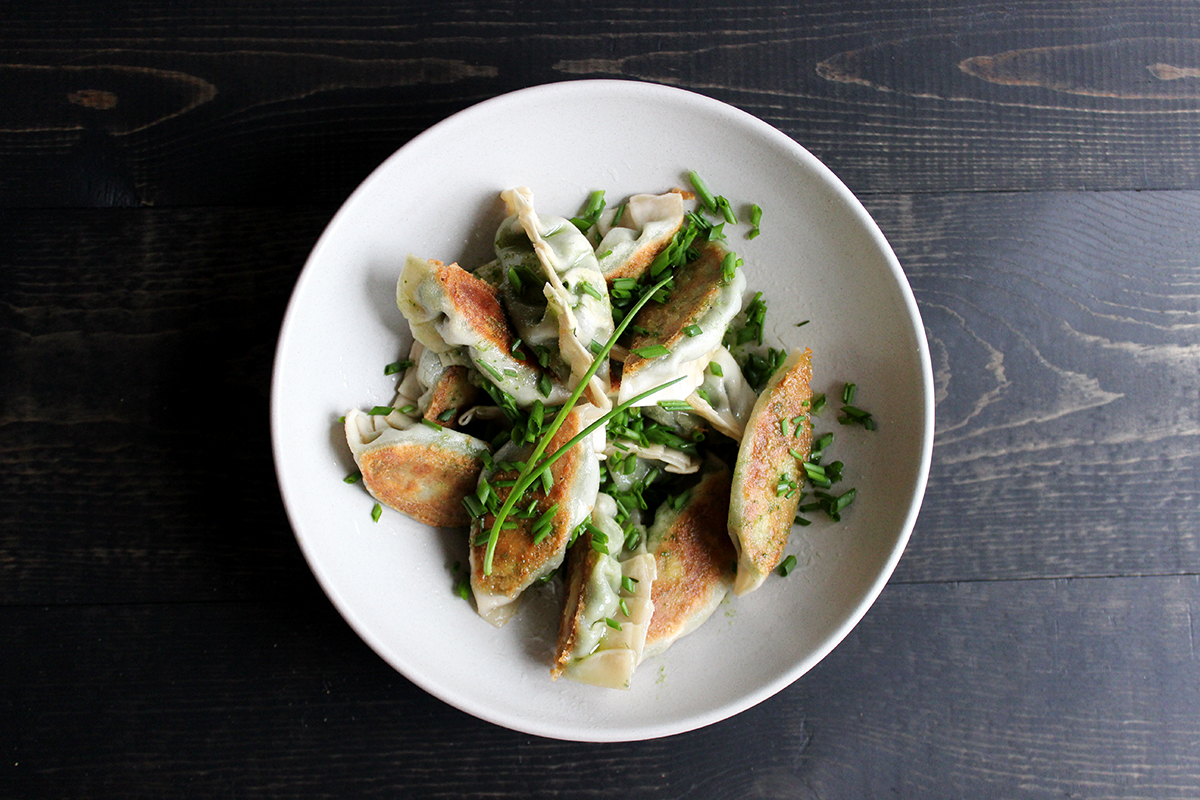
In our house, dumplings are our most revered comfort food. Dumplings, pot stickers, wontons, boiled, in soup, pan-seared, fried, with chili oil. We love them any and every which way. When our favorite neighborhood spot, referred to as “our supplier,” closed down we went into mourning. After we had dried our tears, I went looking for a recipe to console us. Always game to try another dumpling recipe, I was excited to come across Heidi’s Chive Dumplings in Near and Far. These are a wonderful vegetarian rendition of a classic gyoza style pot sticker. The wrapper is thin and delicate up top with just enough contrasting crispiness on the bottom side to give that satisfying crunch and mouth feel. The hearty filling is mild, green (so you know it’s good for you!), and flecked with a hint of umami. The chive oil is a breeze to make and keeps well in the fridge. Not to mention, with its brilliant bright green hue and 100% drizzle-ability, it's absolutely impossible to resist making lots of gorgeous chef-y designs on the plate.


CHIVE DUMPLINGS

— adapted from Near and Far: Recipes Inspired by Home and Travel by Heidi Swanson (Ten Speed Press, 2015)

CHIVE OIL

  • ½ cup sunflower oil
  • ½ cup freshly chopped chives
  • Fine-grain sea salt

DUMPLINGS

  • 2 cups cooked green split peas, at room temperature
  • ½ to ¾ cup coconut milk or half-and-half
  • ½ teaspoon fine-grain sea salt
  • 1 medium garlic clove, smashed to a paste
  • 1 cup well-packed spinach
  • 1/3 cup chopped chives
  • 1 package 4-inch round pot sticker wrappers


METHOD (Adapted)

For the chive oil, puree half of the chives with the sunflower oil, then stir in the remaining chives and add a pinch of sea salt to taste. This can be made ahead, refrigerated, and brought to room temperature before using.

For the dumpling filling, whiz the cooked split peas in a food processor just a bit, then pulse in ½ cup coconut milk, salt, and garlic. Next comes the fresh spinach and chives stirred in with a few pulses. Gradually add in the remaining coconut milk a bit at a time until you have a nice thick, sticky, tacky consistency. Add more salt to taste.

Filling the dumplings is the fun part. And a little prep setting up your filling station goes a long way for making this an easy process. You will want a place to set the formed dumplings. A parchment-lined baking sheet dusted with a few tablespoons of flour works nicely. Then the bowl of filling, a little bowl of water for wetting the wrappers, a small flat plate as a filling station and a place for the stack of wrappers. If you have one of those mechanized scoopers about ½-1 tablespoon in size, those work great for putting a uniform dollop of filling in each wrapper. But if not a regular old spoon does a perfectly good job of it too.

Place a wrapper on the plate, place a dollop of filling in the center, and run a wet fingertip around the perimeter of the wrapper. Next fold the wrapper in half, pressing to seal the edges (try not to trap any extra air in the packet). Make a nice little crimp or pleat around the semi-circle seam edge and set the dumpling with it soft, round bottom side down, on the lined baking sheet. You may have to press each one down a bit to flatten the bottom and get it to sit up straight.

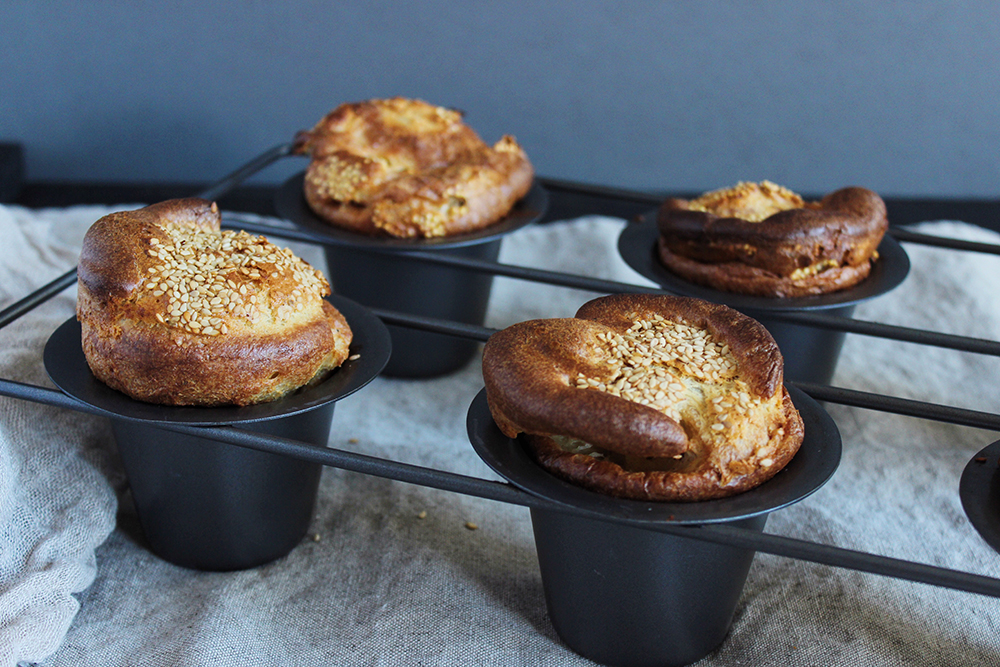
Once the dumplings are all formed I like to cook them up or freeze them right away. Too much air exposure tends to dry out the wrapper. If you like soft dumplings, they can be dropped into boiling water for about 3-5minutes. But if you prefer the crisp, golden brown bottom a nice pan-sear is the way to go. Heat a large skillet or wok over medium-high heat, add in the sunflower oil, and place in as many dumplings as will fit, seam side up. They can be nestled tightly together but its better if they don’t touch less they stick together. Let the dumplings cook for a few minutes until the bottoms start to brown, being careful not to burn them. Pour in 1/3 cup water, immediately cover with a lid, and let them steam for a few minutes until the water has nearly evaporated. Uncover, let the last bits of water steam off, check the bottoms to see that they are just the way you like them, and slide onto a large plate. Serve topped with the chive oil.


Yogurt Bowl by Leslie DiCorpo

Sometimes yogurt is what you have to eat. What's always in your lunch box. The modern day PB&J. Like sensible shoes, long underwear, and that moisturizing face mask you wear on Sunday nights, it is good for you but no matter what the commercial tries to tell you, it is never sexy. Well, that's what I thought until I met this recipe, the Beyonce of Yogurt Bowls. First off let's just talk about the quinoa crisps, tastes like Rice Crispies looks like shiny Millet, yes you want it's phone number. Then, wait, was that bee pollen you saw? Adding brilliant dusty bursts of chroma to your already golden honey pools? Yes it was. Wait a minute Ms. Pomegranate Juice, I know your next, you'll get your limelight. Sunflower seeds, not taking a second row seat this time, come in to add a sustaining, hearty crunch and texture. But the Prima Ballerina who floats in and out of the scene on gossamer wings to steal the show, is the sprinkling of torn and crumbled dried rose petals. Used sparingly, these fuschia beauties add a subtle floral note that together with the sweetness of the honey, make all the flavors sing in chorus and elevate this bowl of yogurt to Beyonce status. 


YOGURT BOWL

— from Near and Far: Recipes Inspired by Home and Travel by Heidi Swanson (Ten Speed Press, 2015)

INGREDIENTS

  • 2 tablespoons fresh pomegranate juice
  • a drizzle of honey
  • a big dollop of Greek-style yogurt
  • a handful of puffed quinoa cereal
  • a sprinkling of toasted sunflower seeds
  • whole pomegranate seeds of fresh or dried rose petals
  • a bit of bee pollen (optional)

METHOD

In a bowl, swirl the pomegranate juice and honey into the yogurt just a bit, sprinkle with the cereal and sunflower seeds, then finish with the pomegranate seeds or rose petals and bee pollen (if you are using).

Notes from Leslie

  • Spread the dollop of thick Greek yogurt around the base of a shallow wide mouth bowl, making sure to create generous ravines and valleys for the lovely toppings to glide over and pool into.
  • I used both pomegranate seeds and a few dried crumbled rose petals cause if you've got it, why not flaunt it?


Red Lentil Hummus by Leslie DiCorpo

Boring. Ubiquitous. Hum drum ole Hummus. So often it is a shelf stable, pre-packaged, been in this container for 3 months already rendition that is in front of us. Is it even possible to remember a time when hummus had some soul, when it brought delight, and on occasion even a little revelation? 

I can admit to having known a few hummuses (or is it hummi?) of such repute, little mini show stoppers in their own right. They are: 1. My sister’s Pickled Red Beet Hummus with it's brilliant magenta glow  2. My college roommate's mom's Classic Lebanese Hummus topped with a fruity olive oil and browned pine nuts - never met a smoother, silkier hummus - and 3. The newest entry to the list, Heidi Swanson’s Red Lentil Hummus.  Definitely worth getting the food processor out of the cabinet for folks.

The red lentils add an unexpected and enchanting earthy note to the blend that, combined with the ribbon of toasted sesame oil threaded through, provide a nutty, rich, nuanced flavor that is altogether quite addicting.


RED LENTIL HUMMUS

— Adapted from Near and Far: Recipes Inspired by Home and Travel by Heidi Swanson (Ten Speed Press, 2015)

INGREDIENTS

  • 2 ½ cups cooked red lentils (see Note)
  • 2 medium cloves garlic
  • 3 tablespoons freshly squeezed lemon juice
  • 2/3 cup tahini
  • ¾ teaspoon fine-grain sea salt
  • 2 to 3 tablespoons whey, kefir, or warm milk
  • 2 teaspoons black sesame seeds
  • Extra-virgin olive oil (a good amount), toasted sesame oil (a few drops), minced chives, and/or chive blossoms, to serve


METHOD (Adapted)

Start by blending the cooked lentils and garlic together in the bowl of a food processor for at least a minute, then add the lemon juice, tahini, and sea salt. Blend for another minute.  Add a splash of the whey a bit at a time and keep blending until the hummus is smooth, creamy, and aerated. Adjust the seasoning until it is to your liking, adding more salt or lemon juice as needed. To serve, top with the black sesame seeds, a drizzle of toasted sesame oil, olive oil, and chives and chive blossoms.

NOTE: To cook the lentils, take 1 ½ cups dried red lentils, rinse them well, and put in a saucepan with 1 ¾ cups water. Cover, simmer, and cook until tender, about 15-20 minutes.


LESLIE’S NOTE:

·      I reverse the quantities of toasted sesame oil and olive oil here because I love toasted sesame oil.

Fennel Stew by Leslie DiCorpo

In my admittedly bizarre mind, stews are the football game of the culinary playing field. An unabashedly hearty scrimmage of bold flavors and big textures bashing into each other, and when it’s a really good match up, there will be a few nimble escalations per serving that make you want to stand up and cheer. That was until I met this stew. The stand up a cheer part is still there, but the textures are nuanced and synchronized, more of a mélange than a scrimmage, the flavors subtle and harmonized.

Slivers of fennel, loads of leek and onion, pillowy soft beans in a mild saffron scented broth accentuated by these tiny bits of salt-cured olive and crumbly creamy & tangy feta; this was a new kind of stew for me. Delicate, subtle, yet substantial, dare I saw sophisticated? So lovely it made me put down my phone. I sipped the broth, wiggled a few more fennel fronds onto my spoon and enjoyed the simplicity. 

FENNEL STEW

— adapted from Near and Far: Recipes Inspired by Home and Travel by Heidi Swanson (Ten Speed Press, 2015)

  • 4 small (baby) fennel bulbs, cut into thin wedges, fronds reserved
  • 2 generous pinches of saffron (about 40 threads)
  • Fine-grain sea salt
  • ½ cup extra-virgin olive oil
  • 4 small yellow onions, cut into ¼-inch slices through the root end
  • 4 medium leeks, washed, trimmed, and cut into ¼-inch slices
  • 6 small cloves garlic very thinly sliced
  • 2 pounds of cooked corona beans (cannellini work well too)
  • 2/3 cup dry white wine
  • 2 to 3 cups warm water (or broth left-over from cooking the beans)
  • Feta or goat cheese, chopped oily black olives, and lemon wedges to serve


METHOD

It is important in this recipe to take care when cutting the vegetables as their shape and size subtly plays into the harmonizing effect of the whole.

Blanch the fennel briefly in well-salted boiling water until crisp tender, 1-2 minutes, drain, put in an ice bath until chilled, and drain again. Set aside.

Using a mortar and pestle, grind the saffron with ¼ teaspoon sea salt.

In a large pot over medium heat gently heat the olive oil and saffron until fragrant. After about a minute, add the onions and cook gently for about 10 minutes. This is just to soften them, but we don’t want any browning here. Add in the leeks and garlic, give it all a good stir and cook for another few minutes. Add the wine, beans, and just enough water or broth to cover the beans. Bring everything to a gentle simmer for 3-4 minutes. When you are just about ready to serve the stew, stir in the reserved fennel slices and any fennel fronds to warm them through. Top each serving with the chopped olives and feta or goat cheese. Give a good squeeze of fresh lemon juice to each and you’re ready to dig in.


Shredded Tofu Stir Fry by Leslie DiCorpo

Shredded tofu, a delicate creamy slightly sweet & spicy dressing, wilted pea shoots and the crunch of toasted pepitas and sesame seeds. Reminiscent of a warm salad, it makes a brilliant lunch and takes all of 5 minutes to make.

The genius of this one dish meal lies in shredding the tofu. All those miniscule tears open up endless craggy bits and holes that soak up the light, lovely dressing like a sponge. The pea shoots and pepitas add loads of texture and crunch. I have to say, I'm a big fan. 

SHREDDED TOFU STIR FRY

— from Near and Far: Recipes Inspired by Home and Travel by Heidi Swanson (Ten Speed Press, 2015)

INGREDIENTS

  • 1 small serrano chile, seeded and minced
  • Fine-grain sea salt
  • 1 tablespoon white wine vinegar
  • 1 teaspoon runny honey
  • 4 tablespoons extra-virgin olive oil
  • 1 tablespoon creme fraiche, buttermilk, or sour cream
  • 2 cups pea shoots
  • 8 oz extra-firm tofu, shredded on a box grater
  • 3 tablespoons black sesame seeds

METHOD

Start by making the dressing; you'll want it ready when you start to cook. Whisk together the chile, 1/4 teaspoon of salt, the vinegar, honey, and 3 tablespoons of the olive oil, until emulsified. Add the creme fraiche and whisk again. Taste and adjust to your liking. Set aside.

Just before serving, heat the remaining tablespoon of olive oil in a large skillet or wok over medium-high heat. When hot, add the pea shoots and a pinch of salt and saute for just 5 seconds or so. The shoots will quickly begin to wilt. Immediately transfer them to a plate and place the tofu in the hot skillet with most of the pepitas and sesame seeds and two-thirds of the dressing. Turn off the heat and toss gently to distribute the ingredients without breaking down the tofu too much -- you just want to warm the mixture a bit. Taste and stir in more salt if needed. Transfer to a serving platter and top with the pea shoots and remaining sesame seeds and pepitas. Serve the extra dressing on the side.

Savory Popovers by Leslie DiCorpo

Popovers from Heidi Swanson's Near and Far cookbook. Secret bonus inside the batter...freshly cracked black pepper and sesame seeds!

Popovers from Heidi Swanson's Near and Far cookbook. Secret bonus inside the batter...freshly cracked black pepper and sesame seeds!

Popovers, for me, have an allure similar to that of soufflés, or the fireworks show on the 4th of July, or Michael Jackson doing The Moonwalk. A good amount of work, much anticipation, and maybe even the planets, all come together so that we may experience this short-lived but very glorious moment of sensory pleasure. The secret about popovers that I hesitate to reveal is that, unlike the Moonwalk, they don’t take hours of technically rigorous training to master. Popovers are actually pretty easy to make. Whisk up a bunch of eggs, add some warm milk, mix in the dry ingredients, pour the batter into a pre-greased pre-heated pan, put it all in the oven, and wait. The most difficult part of making them is probably denying the urge to open the oven door to check the height of the slowly rising beauties.

Once ready, they are a blank slate, well a steaming, egg-y, temptingly hollow blank slate, screaming to be filled with Jam! or Honey! or Butter! I can never seem to remember to wait for them to cool down before ripping open one of those golden crusted steam chambers and I inevitably end up burning my mouth or fingers, or on those days when I’ve completely forgotten I’m an adult, both.

But, as much as I love them, I’ve always had a twinge of guilt making popovers. Do they have any redeeming nutritional qualities on their own? Wait, stop! Do not even attempt to answer that question. No one wants to know the answer to that. Ear muffs everyone! But when I read Heidi’s recipe for Popovers I knew she had wiped away my last line of defense, I’d no longer be able to resist making these regularly. She had deftly resolved my only moral qualm against popovers by adding a sprinkling of millet and some whole-wheat pastry flour. Let the games begin.

POPOVERS

— adapted from Near and Far: Recipes Inspired by Home and Travel by Heidi Swanson (Ten Speed Press, 2015)

INGREDIENTS

  • 2 cups whole milk

  • 2 tablespoons unsalted butter

  • 2 cups whole wheat pastry flour or all-purpose flour

  • 1 1/4 teaspoons fine-grain sea salt

  • 3/4 teaspoon non-aluminum baking powder

  • 1 1/2 teaspoons freshly ground black pepper

  • 5 eggs, at room temperature

  • 1/4 cup raw millet or sesame seeds

METHOD (ABRIDGED) 

Preheating the oven to 425 degrees, with a rack in the low center. Butter your pans and place on a rimmed baking sheet. Feel free to use muffin tins if you do not have popover pans or timbales.

Warm the milk and butter until it is warm but not hotter than 115 degrees. Remove from heat and set a side. Sift the dry ingredients (flour, baking powder, salt) together and stir in the black pepper.

Using an electric mixer whisk the eggs on medium high speed for several minutes. Slow the speed and pour in the milk mixture. Slowly add the flour mixture and beat for an additional minute. If your bowl does not have a pouring spout transfer to a pitcher.

Preheat the buttered popover pans in the oven for a few minutes, not more than 3, and then remove from the oven. Be careful not to let heat escape from the oven when you are taking these in and out. Fill each 2/3 of the way full with the batter and sprinkle with the millet or sesame seeds. Put the filled pans back in the oven and turn down the heat to 400 degrees. Bake for 30-45 minutes, depending on your oven.

The trick here is not to open the oven while the popovers are baking. Peek through the window if you can and let them bake for as long as you can stand it. The goal is golden crusts that have risen about 2 inches out of the pans.

Notes from Leslie

  • I have one popover pan with 6 wells. This recipe would easily fill 2 of these pans. I ended up using 4 additional ramekins to make use of the extra batter.

  • Don’t be a dingbat like me and put your buttered pan in the oven for 10 minutes instead of the prescribed 3. I’ll kill the suspense for you. The butter burns and you have to start over. Not fun.

  • Her recipe calls for a topping of a few tablespoons millet or sesame seeds, offering a welcomed textural garnish. Given that my constitution is 50% curiosity, I therefore needed to know what both options tasted like, so I did a 50-50 split. Half the batch got sesame, half millet.

  • While it doesn’t sound like a lot, 3 TBSP of seeds went pretty far, and in some cases seemed to weigh down the top of the popover. Next time I will try a smaller quantity of toppings to see if I can get more of that coveted height.

  • At 30 minutes mine were very, very brown. About a smidge from burnt. Next time I’ll check in at 25 minutes and tomorrow I’ll be checking my oven’s temperature gauge.

  • Diving into this my first-ever savory popover I was instantly struck with visions of future batches… Everything Popovers with Onion, Garlic, Sesame, and Poppy Seeds. Toad in the Hole Popovers with a tear of thick country ham bobbing about. A few shreds of Asiago or Gruyere flecked with fresh Rosemary.


Aloo Bhaji and clarified butter by Leslie DiCorpo

A cauliflower version of Aloo Bhaji from Near and Far ready for the oven.

A cauliflower version of Aloo Bhaji from Near and Far ready for the oven.

I'm so glad cauliflower is not on the endangered species list. If it were I'd feel total guilt for having single handedly put it there myself. The way my husband and I hover over the roasting pan when we pull those golden brown clusters out of the oven, vying for the perfectly caramelized bits, you'd think those cruciferous crumbles were laced with dopamine. 

On my first flip through Near & Far I was anxious to try Heidi's recipe for Aloo Bhaji which foretells of the most unctuous, pillowy, spice-laden roasted new potatoes. But when I read further and saw her suggestion to try a version of it with cauliflower, well it jumped right to the top of my "recipes-I-must-cook-immediately" list. Given the fact that I'd be sharing the spoils with my husband, I decided doubling it would be wise. The 2 pounds of florets fit splendidly into my 12" cast iron skillet. (pictured here)

With a quick stir the florets are dressed in a few diced chilies, mustard and cumin seeds for spice, fenugreek for earthy, piquant goodness, some clarified butter, shallots, and garlic. About 60 minutes in a 375 degree oven and you are there. Oh, even though cauliflower has my heart, I have to say the shallots and garlic heads were like a one-two punch, a double whammy, Beyonce and Bruno Mars on stage. Incredibly gorgeous going in the oven and powerhouses of flavor coming out. Transformed by the roast, each softened tooth of garlic slips out of it's papery wrapper, which I'll admit is too much fun. Let's be real, I know I'm not the only adult who likes to play with her food.

Though I loved this hearty satisfying dish, and enjoyed eating it immensely, the real moment of wonder and delight came from making a subsidiary ingredient.  As you will see, Aloo Bhaji, like several other dishes in her book, has a recipe within the recipe. This nestled one is for Clarified Butter. And 7 tablespoons of it. My penchant for practicality would normally have had me just whiz on ahead, substituting vegetable oil without a qualm. But, at curiosity's beaconing, I reached for the butter and set about my first ever clarification. Clarified butter is made through a process of gently heating the butter to separate the milk solids from the oil, which are then siphoned off, leaving behind a shelf stable fat with a higher smoke point. Ghee is clarified butter taken a step further where the milk solids are allowed to brown, lending a more toasted, caramelized flavor profile. My local market sells jars of ghee, and granted, I could have just run out and purchased one but then I would have foregone the rich, caramelized butter smell that swirled around me as I made it...this may be how heaven smells folks.  And I would have remained ignorant of the other lovely and useful by-product of this process -- my own little jar of browned-butter milk solids. These are a treasure to later find in the fridge and drizzle on some lucky little tidbits.

So, moral of the recipe is - make the ghee! Breath deeply, swirling the golden foaming pot, and relish in the buttery goodness. Oh I haven't even told you yet about the buttered lettuce recipe from the Paris section of the book! I tried that the next day using the browned-butter milk solids and it was a magical revelation .... one to share next time!


ALOO BHAJI

SERVES 4-6

— from Near and Far: Recipes Inspired by Home and Travel by Heidi Swanson (Ten Speed Press, 2015)

INGREDIENTS

  • 1 pound small new potatoes
  • 7 tablespoons clarified butter
  • 1 1/2 teaspoons cumin
  • 2 serrano chiles, seeded and minced
  • 1 1/2 teaspoons whole yellow mustard seed
  • 1/2 teaspoon ground fenugreek
  • 8 small shallots
  • 2 whole heads garlic, top third cut off
  • fine grain sea salt
  • 3 tablespoons toasted sesame seeds

Preheat oven to 375F. Give the potatoes a good scrub and place them in a large pot of boiling salted water. Simmer until just tender, about 10 minutes. Drain well and set aside.

In a large cast iron skillet or casserole, melt the butter over medium heat, and when hot, stir in the cumin, most of the serrano chiles, and the mustard and fenugreek. Saute until fragrant, barely a minute, and carefully add the potatoes to the skillet, in a single layer if possible. Toss gently to coat with butter and spices and remove from the heat. Nestle the shallots and garlic alongside the potatoes, sprinkle with 1/2 teaspoon salt, and move to the oven. Roast for 60 minutes, tossing once or twice along the way, until the potatoes are deeply golden and the garlic and shallots are perfectly soft. Serve sprinkled generously with the sesame seeds and the remaining serrano chiles.

Notes from Leslie

  • I used cauliflower instead of potatoes, skipped the boiling, and roasted for an extra 10 minutes.


Sag Paneer by Leslie DiCorpo

Heidi's recipe for Sag Paneer from Near & Far. Homemade paneer really makes this dish shine.

Heidi's recipe for Sag Paneer from Near & Far. Homemade paneer really makes this dish shine.

One of my favorite Indian dishes is sag paneer. Unfortunately, finding a deliciously satisfying version, either in recipe form or at a local restaurant, is quite a challenge. That is until I made Heidi's Sag Paneer. The recipe calls for homemade paneer, loads of fresh spinach, a bit of onion, a few spices, and a good squeeze of lemon. The paneer is totally worth the bit of effort it requires and a hand blender makes whizzing the spinach into a chopped state a breeze. 

After only a few minutes of sauteing and stirring it all comes together. As I put the finishing touches on mine and took a taste, I pronounced "This is how I always imagined it could be!" and waltzed, spoon in hand, around my husband in the kitchen. Bright, earthy, warming, a touch spicy and yes, actually green. The paneer tastes like fresh delicious cheese and oh it is a glorious moment when you find there's a piece of it on your fork! The toasted cumin seeds, enshrouded in the gnarly gorgeous sludge of spinach and onion, are reminders of how lucky you are to be eating this. And guess what... no grease pools! Heidi, being the beauty lover that she is, tops hers with chive blossoms. I hope to do that one day soon too, if I can ever find those precious purple pom poms. But until then I'm reminded to always be hopeful and to keep seeking. Those bright, delicious, satisfying recipes are out there!  


SAG PANEER

— from Near and Far: Recipes Inspired by Home and Travel by Heidi Swanson (Ten Speed Press, 2015)

Makes about 3 cups

INGREDIENTS

  • 3 tablespoons sunflower oil or ghee
  • 1 1/2 pounds baby spinach, well washed
  • 1 teaspoon whole cumin seeds
  • 1 teaspoon fine-grain sea salt
  • 1 scant teaspoon red chili flakes
  • 4 medium cloves garlic, smashed
  • 2 small white onions, minced
  • 2 teaspoons garam masala
  • 1/2 cup buttermilk
  • Lots of fresh lemon juice
  • 6 oz fresh paneer
  • Chives or chive blossoms, to serve (optional)

METHOD

Place 1 tablespoon of the oil in a large pot over medium heat-high heat. When hot, add the spinach and stir until it begins to collapse. You may need to add it in tow or three additions, but get all the spinach in the pot as quickly as you can. Once it has collapsed, but is still bright, a couple of minutes, remove from heat, drain, and blend to a puree with a hand blender. Set aside.

Give the pot you cooked the spinach in a quick rinse, and the place it over medium-high heat with the remaining 2 tablespoons of oil. Add the cumin seeds, salt, red pepper flakes, garlic and onions. Cook until the onion is translucent, a couple of minutes. Stir in the garam masala, dial back the heat, and stir in the spinach. Gradually stir in the buttermilk and bring to a simmer. Stir in a couple of big squeezes of lemon juice. Taste and adjust the seasoning, fold in the paneer (or sprinkle it on top), and finish with a sprinkling of chives or chive blossoms.

Notes from Leslie

  •